What is Jenkins?
Jenkins is open-source tool, written in the Java programming language, used to implement CI/CD automation workflows, called pipelines, integrated with multiple plugins. Jenkins achieves Continuous Integration with the help of plugins. Plugins allow the integration of Various DevOps stages. If you want to integrate a particular tool, you need to install the plugins for that tool. For example Git, Maven 2 project, Amazon EC2, HTML publisher etc.
Why Jenkins?
Automation - Why do everything manually, if you have a tool that can automate your tasks called Jenkins. It offers a seamless environment for automation, providing tools for building, deploying, and automating any project (CICD). Everyone says Jenkis is used only for CICD,I have satrted working in Jenkins with Simple tasks to automate repetitive manual activities. Its open-source nature, coupled with a vast plugin ecosystem, makes it highly adaptable for various software development needs.
Workflow -> Jenkinsfile - Pipeline as a code - Stored in Repository - has pipeline script - written in Groovy.
Create a file - name as Jenkinsfile - write pipeline, agent, stages, stage and define each step can do.
Jenkins Pipeline skeleton.
#Jenkinsfile (Declarative Pipeline)
pipeline {
    agent any
    stages {
        stage('stage1') {
            steps {
                   }
        }
        stage('stage2') {
            steps {
                   }
        }
        stage('stageN') {
            steps {
                   }
        }
    }
}
Step-by-step guide to install Jenkins on Ubuntu:
1. Update System: Before installing Jenkins, it's a good practice to update your system's package database:
sudo apt update -y
2. Install Java: Jenkins is a Java application, so Java is a prerequisite. If you don't have Java installed, you can get OpenJDK: Always prefer Jenkins official website and copy the latest package/commands from there. https://www.jenkins.io/doc/book/installing/linux/#debianubuntu
sudo apt install openjdk-17-jre
java -version
3.Install Jenkins: To ensure you're installing the latest Jenkins version, it's best to add the Jenkins repository to your system.Next, append the Jenkins repository to the system's sources list:
curl -fsSL https://pkg.jenkins.io/debian-stable/jenkins.io-2023.key | sudo tee \
  /usr/share/keyrings/jenkins-keyring.asc > /dev/null
echo deb [signed-by=/usr/share/keyrings/jenkins-keyring.asc] \
  https://pkg.jenkins.io/debian-stable binary/ | sudo tee \
  /etc/apt/sources.list.d/jenkins.list > /dev/null
sudo apt-get update
sudo apt-get install jenkins
4. Start and Enable Jenkins: Now, start the Jenkins service.If you want Jenkins to start automatically at boot enable it.
sudo systemctl start jenkins
sudo systemctl enable jenkins
5.Accessing Jenkins: By default, Jenkins runs on port 8080. So, you can access it by going to your browser and visiting: http://your_server_public_ip:8080
If you are using EC2 make sure to add port 8080 in the security group.

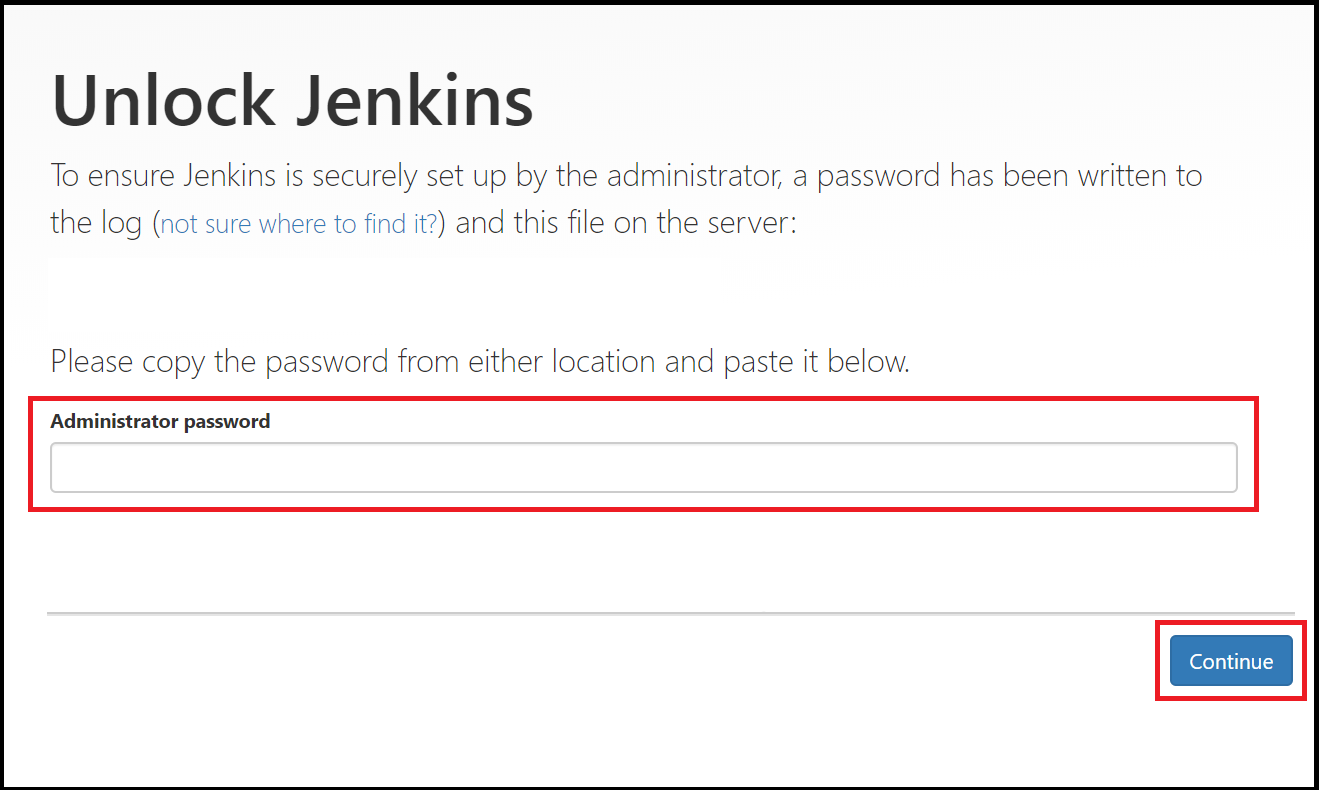
6. Unlock Jenkins: https://learn.microsoft.com/en-us/azure/developer/jenkins/configure-on-linux-vm
When you first access the Jenkins dashboard, it'll ask for an unlock key. Retrieve the key with:
sudo cat /var/lib/jenkins/secrets/initialAdminPassword
Copy the outputted key and paste it into the Jenkins dashboard to proceed.
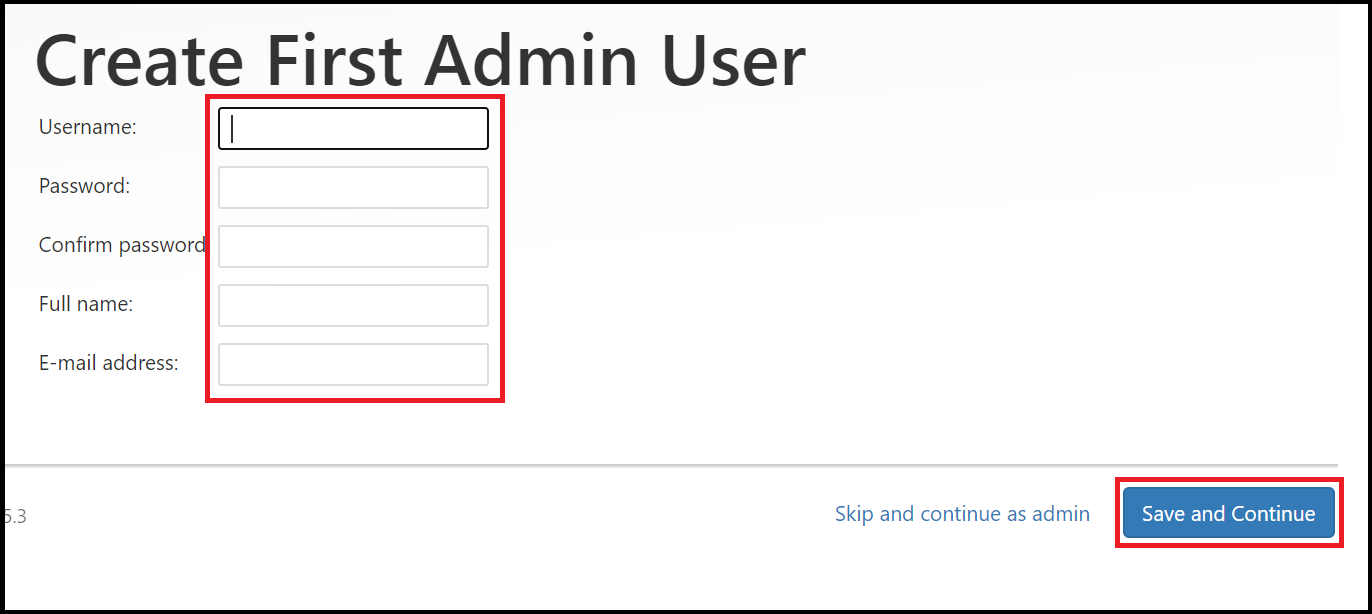
**7. Initial Setup:**Follow the on-screen instructions: You can install the suggested plugins or choose specific ones based on your needs. Create the first admin user.
Enter the information for the first admin user and select Save and Continue.

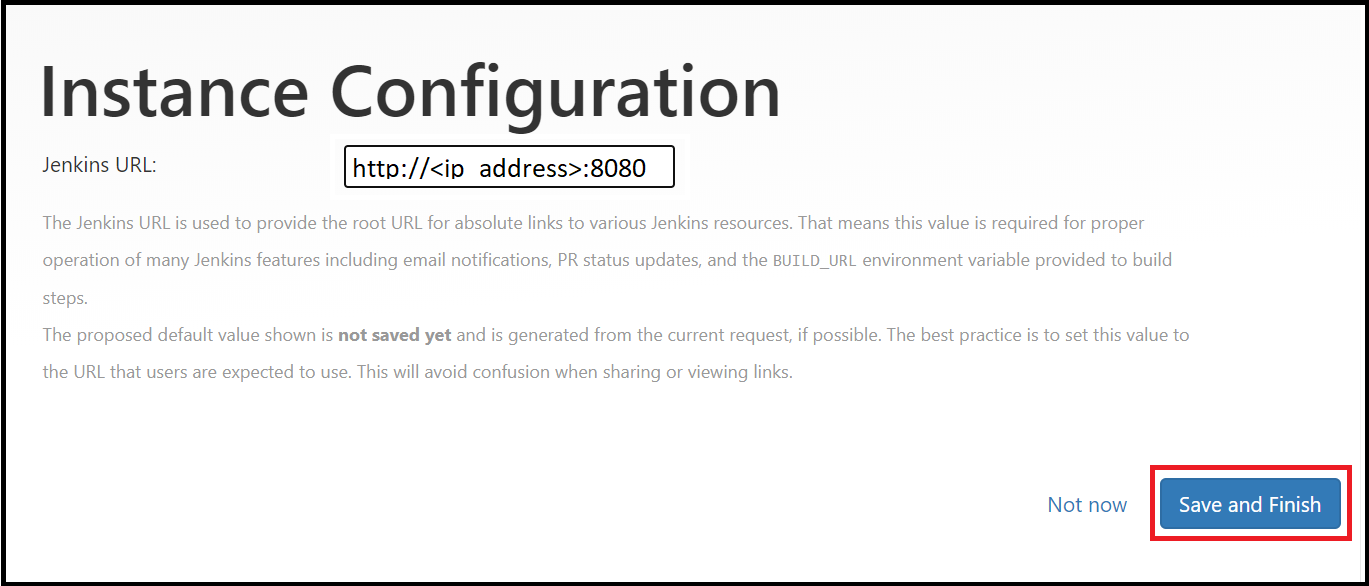
On the Instance Configuration page,Put your Ip Addr with port, select Save and Finish.

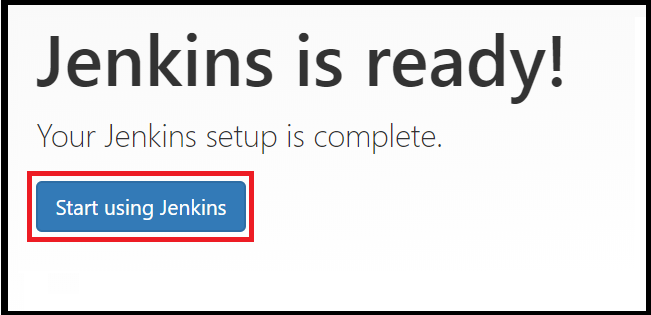
Select Start using Jenkins.

Create a freestyle pipeline to print "Hello World!!
1. Login to Jenkins
2. Create New Item
Click on “New Item” at the top left-hand side of your dashboard

Enter Item details
In the next screen, 1)Enter the name of the item you want to create. We shall use the “Hello world” for this demo. 2) Select Freestyle project 3) Click Okay.

Enter Project details : Enter the details of the project you want to test.

Go to Build Step. Add Build Step --> Execute shell --> Write command --> echo "Hello World" and Save

Build Now:

Console Output.

