

One of the biggest challenges when working with containers is persistent data management. Imagine you’ve configured a container perfectly only to find out that once the container stops, all your hard work disappears. Enter Docker Volumes! Docker Volumes are designed to tackle exactly this issue. They enable persistent data storage, ensuring that your data remains safe and sound even after a container lifecycle ends.
What is a Docker Volume?
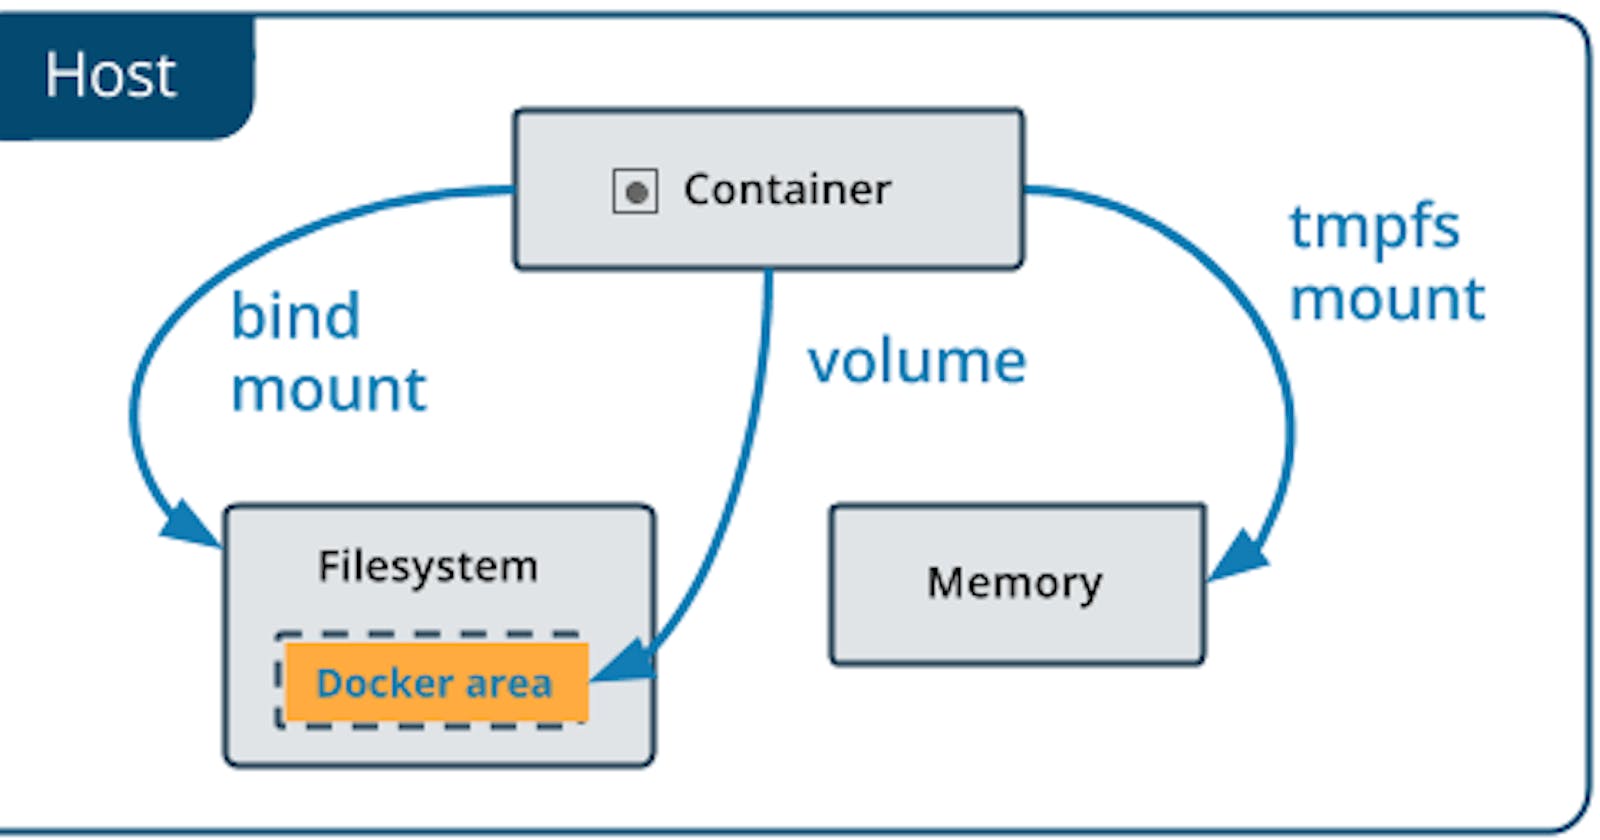
In simple terms, a Docker Volume is a designated directory on the host machine which bypasses the Union File System, used to store and manage data in Docker. This directory becomes a reference point for Docker to save and retrieve data.
Docker Volumes offer three key benefits:
Data Persistence: Even if the container shuts down, the data remains.
Data Sharing: Multiple containers can share access to a single volume.
Performance: Volumes offer better I/O performance as compared to Docker containers.
Types of Docker Volumes
Before diving into an example, it’s essential to understand the three primary types of Docker Volumes:
Anonymous Volume: This is the simplest type. It's a chunk of space which Docker creates, but neither the developer nor Docker assigns it a specific name.
Named Volume: As the name suggests, this volume has a specific name. Docker manages the storage location, ensuring no accidental overrides.
Bind Mount: This is the most flexible type, allowing a user to specify both the location on the host and within the container.
Example: Setting up a MySQL Container with a Named Volume
In this tutorial, we'll use Docker to set up a MySQL container, ensuring data persistence using a named volume.
Create the named volume:
docker volume create mysql_dataRun the MySQL container: Use the named volume, linking it to the default MySQL data directory (
/var/lib/mysql).docker run --name mysql-container -v mysql_data:/var/lib/mysql -e MYSQL_ROOT_PASSWORD=my-secret-pw -d mysql:latestHere, we:
Set the container name to
mysql-container.Use
-vto bind our named volumemysql_datato the MySQL data directory.Use
-eto set an environment variable for the MySQL root password.Finally, specify the MySQL image we want to use.
Check if it worked: You can inspect the volume to see if it’s being used by the container.
docker volume inspect mysql_data
You'll see details of the volume, including its location on the host machine and which containers are using it.
Simulate container failure: Let’s see if the data persists even if the container stops.
First, let's enter the MySQL shell and create a sample database:
docker exec -it mysql-container mysql -u root -pEnter your password (
my-secret-pwfrom before) and execute:CREATE DATABASE test_db;Now, stop and remove the container:
docker stop mysql-container && docker rm mysql-containerStart a new MySQL container using the same volume:
docker run --name new-mysql-container -v mysql_data:/var/lib/mysql -e MYSQL_ROOT_PASSWORD=my-secret-pw -d mysql:latestEnter the MySQL shell again:
docker exec -it new-mysql-container mysql -u root -pCheck if our database exists:
SHOW DATABASES;
You'll see test_db among the list of databases, proving data persistence.
Conclusion
Docker Volumes are the life-savers of the containerized world. They ensure that your data isn’t just ephemeral but stays persistent and can be shared across multiple containers. As with anything in tech, the best way to learn is by doing. So, give Docker Volumes a try and discover the flexibility and power they bring to your containerized applications!